

Brain Tutor HD Support
Overview
Brain Tutor HD is fun to use and it is easy to figure out how it works - just have a look at the movies on this page. Note that the movies were recorded while using real hardware (iPhone 4S and iPad 2), i.e. they reflect the native speed of the program; in the contrary, the experience and image quality on actual devices is even better than shown in the video clips.While the app is very intuitive to use, the following instructions help you to get the most out of Brain Tutor HD. Check the info below the videos for descriptions how to use the app or simply observe the videos on this page. If you have any further questions or suggestions, please send an email to braintutorsupport@me.com. After launching the app the first time, Brain Tutor HD automatically selects an atlas ("Gyri") and shows all areas of this atlas on a 3D brain model. You can immediately tap on the brain model to select and learn about specific brain regions.
Brain Tutor HD is a universal app, i.e. it runs on the iPad as well as on iPhone and iPod Touch devices. On the iPad the screen is divided into two main parts (in landscape orientation). The left side shows the atlas and brain region tables as well as a text info pane while the right side shows different brain visualizations. In portrait mode, the tables and text pane is not shown as default but can be invoked by touching the "Atlas" button at the left side of the top bar. On the iPhone, all these views are stacked on top of each other and one needs to navigate forward and backward to switch between different info displays.
Brain Tutor HD Running on iPhone
Note that the appearing transparent yellow disks in the video above (iPhone) and the video below (iPad) indicate user interactions with one (1 disk) or two (2 disks) fingers.
Tip: Since the screen space is rather limited on the iPhone, Brain Tutor HD reserves the landscape orientation to display brain models "fullscreen", i.e. all bars on the top and bottom of the screen are removed when looking at a brain visualization - try it out!
Tip: Since the screen space is rather limited on the iPhone, Brain Tutor HD reserves the landscape orientation to display brain models "fullscreen", i.e. all bars on the top and bottom of the screen are removed when looking at a brain visualization - try it out!
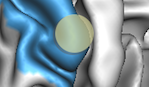
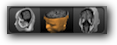
Brain Tutor HD visualizes brain areas on five brain models that can be selected using the tab bar at the bottom of the 3D brain visualization view. Three models are cortex representations of the left ("Left Hemi" icon), right ("Right Hemi" icon) as well as both hemispheres ("Both Hemis" icon). A special brain model for subcortical structures is shown when the "Subcortical" atlas is selected in the "Atlas Type" table. The fifth model is always available showing the head (skin surface) of the subjects measured in the MRI scanner ("Head" icon). Tap on the available icons to switch between different brain views.
The brain views allow to visualize selected brain structures of the currently selected atlas. The head model provides a complementary visualization showing brain structures on three orthographic high-resolution MRI planes ("slices"). This dual representation helps to relate 2D and 3D representations of the same structures.
The brain views allow to visualize selected brain structures of the currently selected atlas. The head model provides a complementary visualization showing brain structures on three orthographic high-resolution MRI planes ("slices"). This dual representation helps to relate 2D and 3D representations of the same structures.
Brain Tutor HD Running on iPad
The video below shows Brain Tutor HD running on an iPad. As opposed to the iPhone (see video above), the larger screen space allows to show tables and explanatory texts (left side) simultaneously with brain visualizations (right side).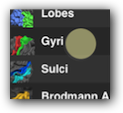
Selecting a Brain Atlas
Select an item in the atlas table ("Atlas Type") in order to switch between different brain partitioning schemes. Select the "Lobes" atlas to explore the major lobes of the brain. Select the "Gyri" atlas to explore the location and names of the major gyri. Likewise, you can explore the sulci by selecting the "Sulci" atlas. Select the "Brodmann Areas" atlas to learn about the approximate location of Brodmann areas; note that these areas are often used in functional brain imaging to roughly specify where in the brain an activation foci has been observed. Select the "Subcortical Areas" atlas to learn about major subcortical structures; when selecting this atlas, a special 3D brain model with these structures will be shown. Select the "Functional Areas" atlas to lean about important functional areas. Note that the incorporated specialized areas in this atlas were identified by a series of functional MRI scans of the subject visualized in the program.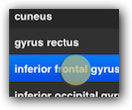
Selecting a Specific Brain Region
After selecting an atlas, a table with all available structures belonging to that atlas will be shown. On the iPad, all areas will be highlighted in various colors on the current visualization of the brain, i.e. either on the surface of a (sub-)cortex model or on MRI slices in case the head model is selected. On the iPhone, the brain areas table contains a button with the name "All" at the right side of the top bar: If you tap this button, Brain Tutor HD switches to the current brain visualization and shows all areas of the currently selected atlas in the same way as on the iPad.While tapping directly on the shown brain model is the most intuitive way to select brain regions, you may also select specific brain structures of the current atlas by name. In order to do that, select an item in the brain regions table. In order to obtain a detailed description of a structure, touch the arrow on the right side of an item. The table with the brain regions list will then be replaced by a information pane containing text information about the selected area; for functional areas, the displayed text includes details about the conducted experiment to activate the respective region. To go back to the table containing the list of brain structures, touch the "back" button on the left upper side. The "back" button will actually show the name of the currently active atlas, e.g. "Sulci". In order to go back to the altas table, click the "back" button - displaying now "Atlas Type" - once more.

Manipulating the Brain Hemisphere Models
You can select the left, right or both brain hemispheres by tapping the "Left Hemi", "Right Hemi" or "Both Hemis" icon in the tab bar on the bottom of the brain visualization view.Rotation. Tap the "Rotation" icon (if not already selected) at the right side of the toolbar on top of the 3D Brain View. To rotate the displayed brain model, simply touch in the brain visualization view and slide your finger up and down as well as left and right.
Translation. Tap the "Translation" icon (if not already selected) at the right side of the toolbar. To move the displayed brain model, simply touch in the brain view and slide your finger in any direction.
Zoom. Use the usual pinch gesture to zoom in or out, i.e. put two fingers on the screen and move them apart (zoom in) or closer to each other (zoom out).
Gesture-based command switching. It may be inconvenient to move the finger to the icons in the toolbar to switch the current command (rotation, translation). You may also change the current command simply by double tapping in the 3D Brain View. In order to not accidentally select another brain region, make sure that you double-tap on a background region.
Slicing the Head Model
Tap the "Head" icon in the tab bar of the brain visualization view to switch to the head model. In this viewing mode, you may slice the brain revealing millimeter precise details from the high-resolution anatomical MRI scan. Any selected area is shown within the 2D brain using the same colors as used for the 3D models. Rotation, translation and zooming of the sliced head model operates in the same way as described earlier for the other 3D models. In head slicing mode, however, the top bar shows four additional icons that allow to slice the head model along three orthogonal directions.Slicing. Tap the "Slicing" icon (if not already selected). To slice in one direction, slide your finger in one direction (e.g. left or up). To slice in the opposite direction, slide your finger in the opposite direction (eg. right or down).
Changing the slicing direction. Tap on one of the three head slicing icons in the toolbar that are called "Axial Slicing", "Coronal Slicing" and "Sagittal Slicing", respectively. The head model will then be sliced as indicated by the selected icon. When sliding the finger in the brain view, slicing will now operate in the directions orthogonal to the slice plane (e.g. up/down, left/right, forward/backward).
Flip cut side. Note that a slice is shown as a cut, i.e. it reveals the slice on one side while the other side shows the head model. In order to reveal the slice on the other side of the cut, tap the currently selected head slicing icon a second time (currently not enabled).
Gesture-based slice direction switching. The current command (rotation, translation, slicing) can be changed by double tapping as described above. In addition, the current slice direction icon can be changed in a similar way by double tapping in the brain view using two fingers.

Settings
Tap the "Settings" icon (see right) on the left side of the top bar to show the "Settings pane". Note that the "Settings" icon is only available when viewing the atlas table, i.e. when the top bar shows "Atlas Type". Note that you may also inspect and change settings outside Brain Tutor HD using Apple's system-wide "Settings" app. The "Settings pane shows 3 options influencing the display used in Brain Tutor HD.If you turn on the Restore Last View option (default: off), the current display state including the selected brain atlas, brain area and 3D view will be saved persistently. When launching the program at a later time, the previously saved state will be restored even if Brain Tutor HD has been removed from working memory. Note that as long as Brain Tutor HD is kept in working memory (multitasking support of iOS), the previous state will be restored even when this option is off.
If the Show Non-Selected Areas option is on (default), the regions not currently selected are also visible - albeit only weakly. This helps to find regions as tapping targets also for those brain atlases that are sparsely covered with areas (e.g. for unctional areas atlas). This visualization option is also useful for comparing the location of other regions with respect to the selected one. By turning this option off, all non-selected areas are displayed using the background color of the brain model or brain slice, i.e. they are invisible. If you have changed this option, tap or slice the brain to activate the new setting.
If the Show Label option is on (default), the currently selected brain region is shown below the brain model. If you do not want to see this label (e.g. on the iPad where the selected area is usually shown in the master view on the left side), turn this option off.
The last part of the "Settings" dialog shows the "About Brain Tutor HD" section containing general information about the program.
