BrainVoyager v23.0
Create New Project
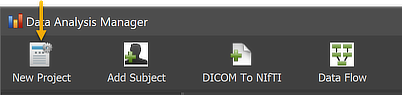
To create a new project, the New Project icon in the main toolbar of the Data Analysis Manager window can be used (see below). The same function can be invoked also by clicking the Plus ("+") icon in the small toolbar of the Projects pane. After clicking one of these icons, the New Project dialog will appear (see screenshot below).
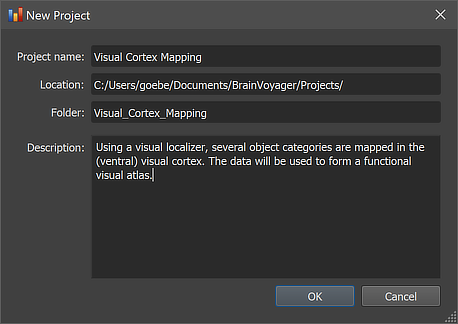
The new project will be referenced by its name that needs to be provided in the Project name text field (the program checks that the same name is not given more than once). The Location text field is filled automatically with the top-level folder (current Projects root path) where the data of created projects will be stored. It is recommended to use the default folder for new projects but the default project path can be changed in the Data Analysis Manager window before calling this dialog. The Folder text field shows the name of the folder that will be created below the Projects root path to store all created and analyzed data belonging to the new project. The folder name is automatically created based on the provided name of the project (blanks will be replaced with underscores) and can be changed if desired (the program checks that the same folder is unique for each project). The Description text field can be used to provide general information about the project. While optional, it is recommended to use this possibility because it will help to identify a project later.
Note that the project will be discovered by its folder name when searching for projects in the Projects directory, which implies that the project's folder name will be the project's final name. To be discovered as a project, the program will also create the sub-folder rawdata (and derivatives) inside the created project directory (project folders without at least a 'rawdata' sub-folder will be ignored when discovering proejcts). To keep the provided descriptive information about the project, the program also stores a JSON file inside the projects folder under the name 'projectinfo.json'. The JSON file also stores the creation date of the project. It can be inspected and changed by clicking the Edit Project icon in the Projects pane as well as with any text editor.
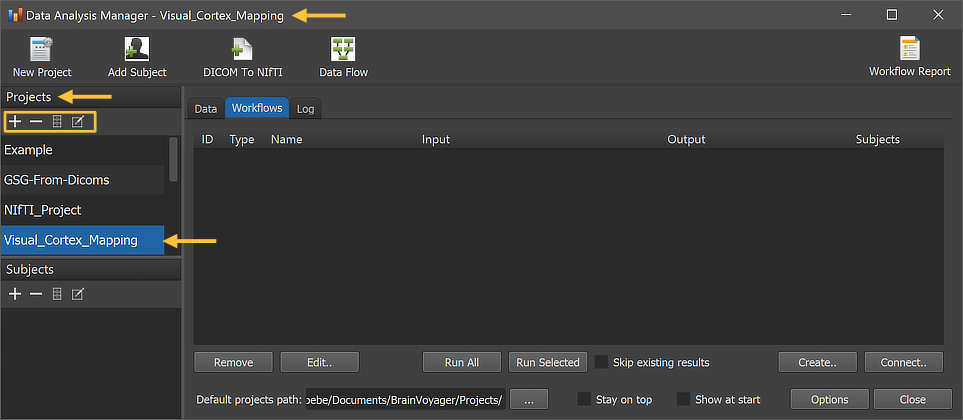
After clicking the OK button, the newly defined project will appear in the Projects pane of the Data Analysis Manager window (see figure above). Since the new project is automatically selected as the currently selected project, its name will also be shown in the title bar of the window. The Subjects pane and displayed Workflows or Data tab are empty since the selected new project does not yet contain any data and workflows. Note that you can at any time edit (some of) the information of a project by either double-clicking its name in the Projects pane or by clicking on the Edit Selected Project icon in the toolbar of the Projects pane (icon on right side in the orange rectangle).
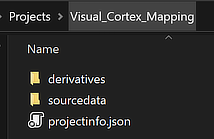
In order to inspect the content of the folder structure of a project, one can use the Reveal Folder icon in the toolbar of the Projects pane (second icon from the right side in the Projects toolbar). This will open the top-level folder in the Finder (macOS) or File Explorer (Windows) as shown in the screenshot above. Note that both the "rawdata" and "derivatives" directories are empty at this stage since no data has been added and analyzed yet. A project can also be removed by clicking the Minus ("-") icon in the Projects toolbar. This function removes all the data of the project from disk and should, thus, be used with care! Finally the Plus ("+") icon can be used to define a new project in the same way as when using the New Project icon in the main toolbar.
After a new project has been defined, subjects and data can be added to the project followed by the creation of workflows that process the data from one or more subjects in a reproducible way.
Copyright © 2023 Rainer Goebel. All rights reserved.